

Support -> How To Edit Your Customer Portal Header
How To Edit Your Customer Portal Header
This guide will show you how to add additional text to your customer portal header within your online booking software.
Step 1. Enter the Edit Header Section
After selecting the Customer Portal tab in the Settings page, click on the "Edit Header" option.

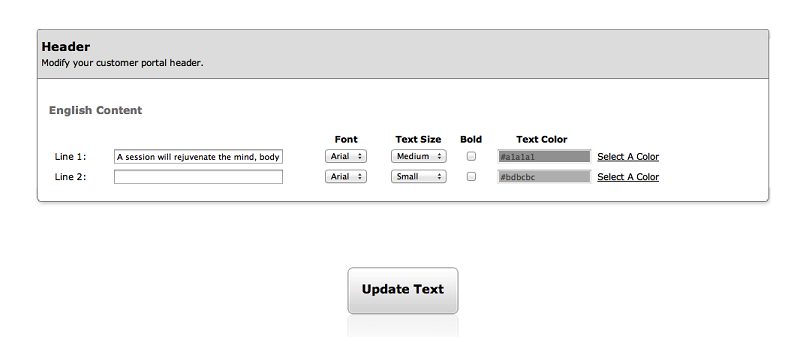
Step 2. Customize the Header Text that Appears on your Client Booking Portal
In the "Header" Section of the page, enter the information you wish to display in your Customer
Portal (such as Name, Mission Statement, etc) in the fields "Line 1" and "Line 2." You may edit
the font type and size by using the drop down menus next to the corresponding Line field. You
may also choose the color of the text by clicking on the "Select a Color" link. By using the
Color Selection Tool that appears, select the color you want for your text by dragging your
cursor to the desired color. When done, please click "Update Text".
Step 3. Verify Your Changes
Verify the look of your customer portal by clicking on the "View Your Customer Portal" link at
the top of the page. This is what your customers will see when they access your Customer Portal.
© 2009 - 2019 calendarspots.com