

Support -> How To Add a Client to a Group
How To Add a Client to a Group
This guide will show you how to organize your clients by group using your customer booking software.
Step 1. Enter the "Client Lookup" Section
After selecting the "Client" tab in the customer booking software, select the "Client Lookup" option.

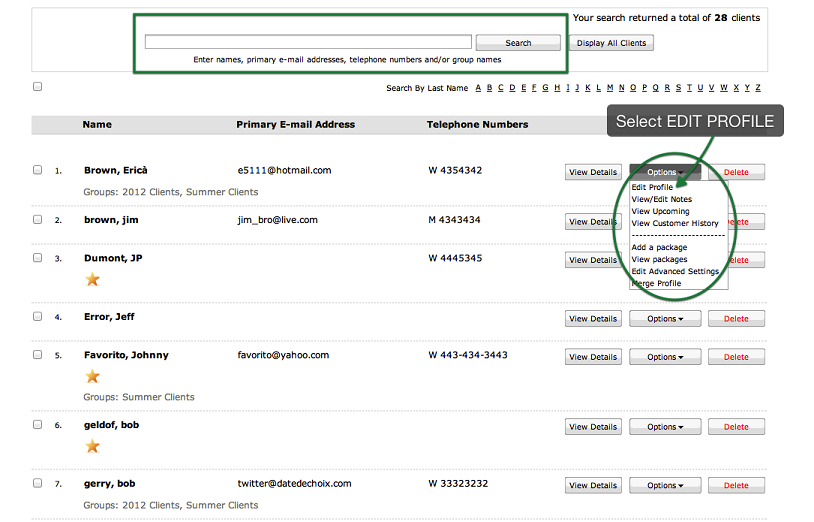
Step 2. Select the Client You Want to Add to a Group
Select the client you want to add to a group by entering the client's name, primary e-mail address,
or telephone number in the search field, or by finding the client in the paginated list. Once you have
found the client, select "Edit Profile" option in the "Options" drop-down menu.
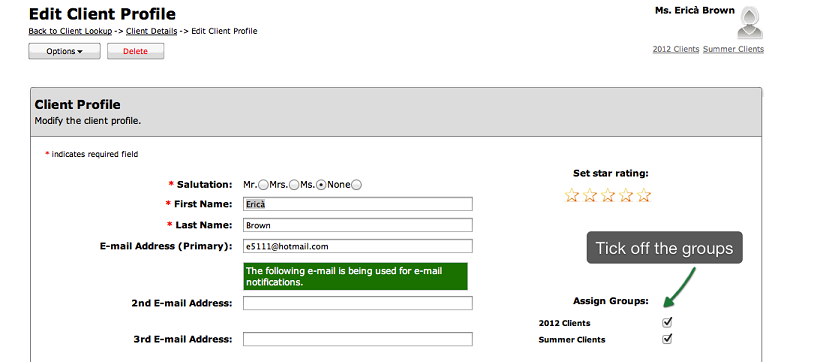
Step 3. Select the Desired Group(s)
Click the "Add Groups" link in the profile section. A window will be displayed that will include all the groups within your
online customer scheduling software. Select the groups you want to assign the selected customer to by checking off the appropriate
boxes and press the "Add Groups" button. The selected groups will now appear within the form.
To remove any group from the customer profile, simply click the X next to the group name or reopen the add groups window and uncheck the selected group. If opening the add groups window, do not forget to press the "Add Groups" button to complete the change.
To remove any group from the customer profile, simply click the X next to the group name or reopen the add groups window and uncheck the selected group. If opening the add groups window, do not forget to press the "Add Groups" button to complete the change.
Step 4. Save Your Changes
Don't forget to click the "Save" button at the bottom of the page to confirm your changes.

NOTES:
a) Groups can also be added to new client profiles on the fly when creating appointments. Within the
"Create New Client" form, simply click on the "Add Groups and Customer Notes" link to view the additional
form fields. Here you can select the "Add Groups" link to view the available groups. Then you can select
the desired groups and click the "Add Groups" button to add them to the form. Removing groups from the client
form can be done the same way as described above.
b) You can also add groups to multiple customer profiles at once. This can be done from
the client look up search results list.
© 2009 - 2019 calendarspots.com