

Support -> How To Set Business Hours
How To Set Business Hours
This guide will show you how to configure your business hours that will be displayed on your online client booking portal.
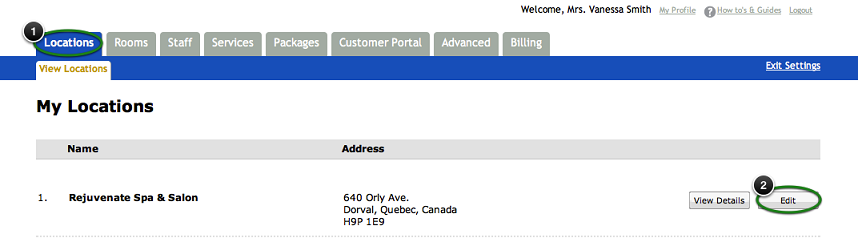
Step 1. Select Your Location
After selecting the Location tab in the Settings page, select the location
you want to edit and click the "Edit" button.
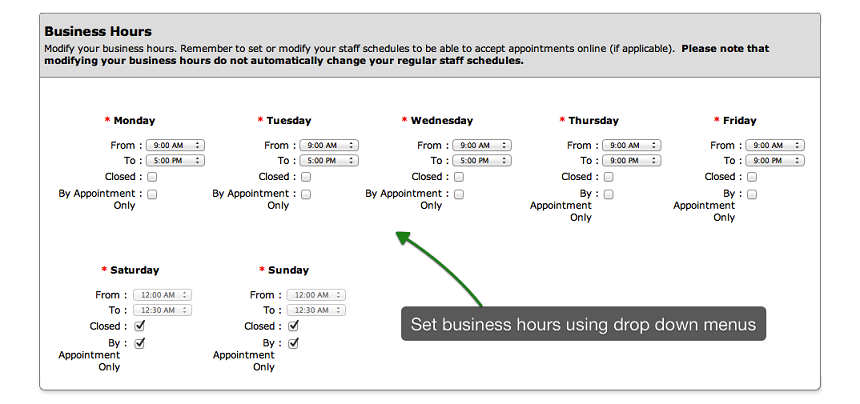
Step 2. Set Your Daily Opening and Closing Times.
Scroll to the Business Hours section of the location form and use the drop down menus to
select the opening and closing times for the location. For days when your business location
is closed, simply check off the "Closed" option under the corresponding days. You can also check the
"By Appointment Only" option if you want to acknowledge that you accept appointments on those days but
not based on a fixed schedule.
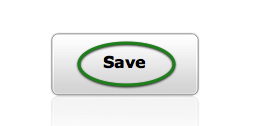
Step 3. Save Your Changes
Don't forget to click the "Save" button at the bottom of the page to confirm your changes.
NOTE:
Your business hours do not affect your staff availability. Online appointment scheduling is controlled by altering the staff schedules and modifying the service scheduling rules.
If using the room planner, rooms will be available for booking based on business hours. Business hours will be displayed in beige/yellow on the booking calendar used for room planning.
© 2009 - 2019 calendarspots.com