

Support -> How To Generate an Appointment Report
How To Generate an Appointment Report
This guide will show you how to generate a report about most popular services, most frequent clients and most active staff based on attended appointments.
Step 1. Select the Report Type
After selecting the "Reports" tab in the main work area, select the "Appointment" tab.

Step 2. Creating an Appointment Report
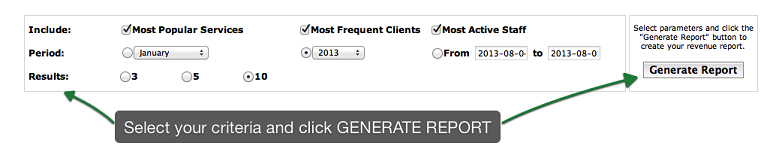
After selecting the "Appointment Report" tab, select the report types you wish to generate. You
may select most popular services, most frequent clients, most active staff, or a combination of the
three. Next, select the period you want the report to cover. You may select a month in the past
year, a year, or a specific range of dates. Finally, select whether you want to see the top
three, top five, or top ten results by selecting the appropriate number. After you have made your
selections, click on the "Generate Report" button to view the report.
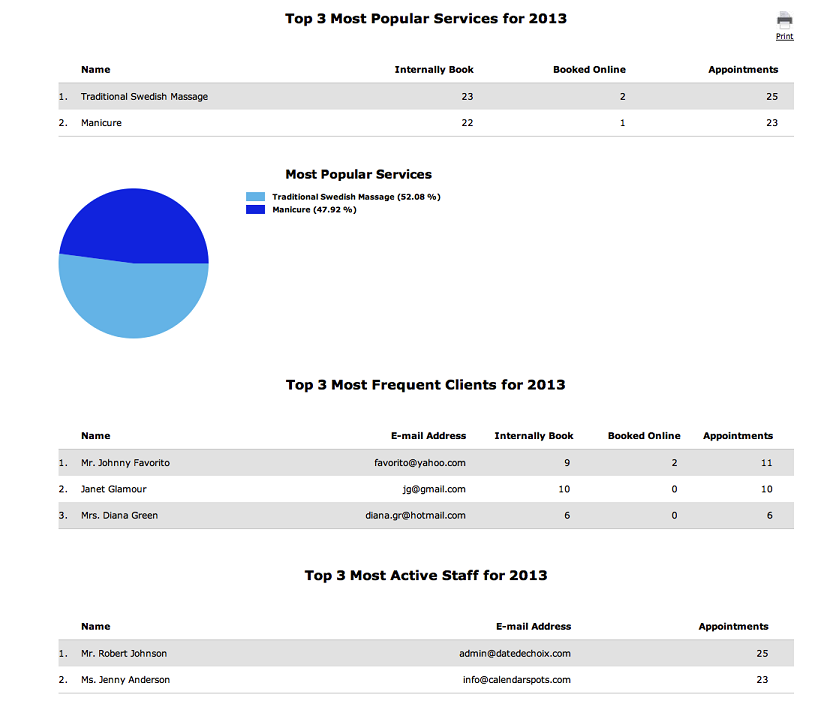
The report will show you the top results for each category you selected. A pie chart will display
similar information in a graphical format. You may print the report by clicking on the "Print" link.
IMPORTANT
In order for appointments to be recorded and subsequently appear in reports, appoinments
must be set to "Attended" status. The status may be changed manually in the appointment details window,
or may be set to "Attended" automatically by selecting this option under "Advanced Settings".
Appointments are set to "Attended" in the middle of the night.
For more information, refer to "How To Set an Appointment to Attended"
© 2009 - 2019 calendarspots.com