

Support -> How To Set an Appointment to "Attended"
How To Set an Appointment to "Attended"
This guide will show you how to set an appointment as attended in the appointment setting software.
Step 1. Enter the "Staff Day Planner" Section
After selecting the "Planners" tab in the appointment setting software, select the "Staff Day Planner" option.

Step 2. Select the Appointment You Want to Set to "Attended"
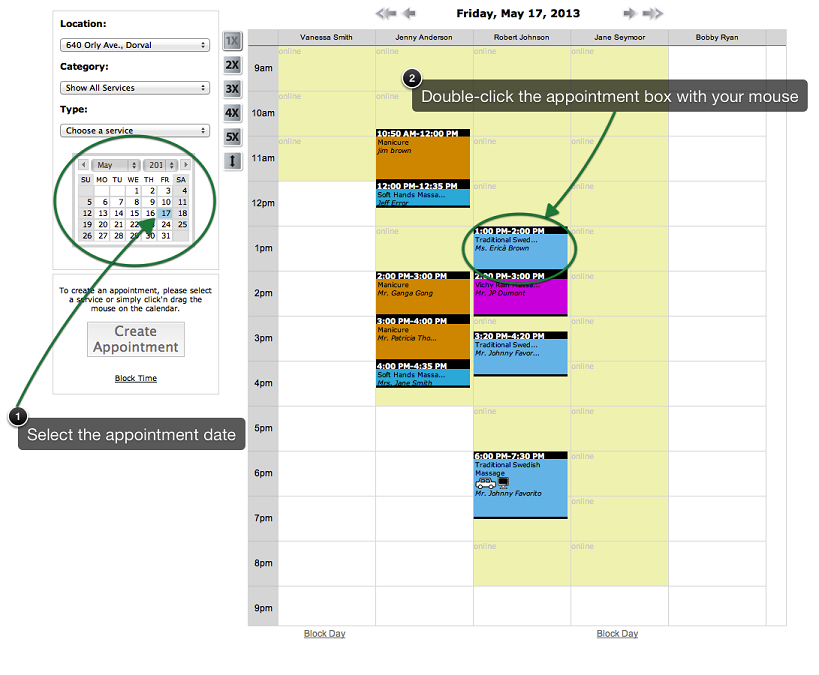
Find the date of the booked appointment by using the datepicker to the left of the interactive online scheduling calendar.
The selected day will be highlighted in blue in the datepicker and the day's schedule will
appear to the right. You may also use the the arrows above the daily scheduler.
In the daily schedule, select the appointment you wish to set to "Attended" by double-clicking on the appointment box. The Appointment Details window will appear.
In the daily schedule, select the appointment you wish to set to "Attended" by double-clicking on the appointment box. The Appointment Details window will appear.
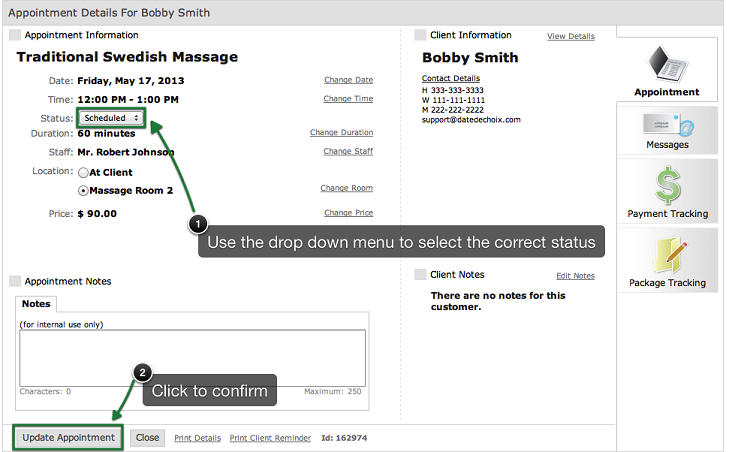
Step 3. Change the Status of the Appointment
In the Appointment Details window, change the status of the appointment to "Attended" by using the
drop-down menu next to "Status". Confirm the status change by clicking on the "Update" button.
IMPORTANT
All appointments with an "Attended" status are archived in the system for future reference.
While you can manually change the status of an appointment from "Scheduled" or "Confirmed" to "Attended",
an option exists that will automatically change the status to "Attended" in the middle of the night.
If you have already set the appointment to "No Show", the scheduling system will not change it to "Attended".
You can activate this option by going to Settings -> Advanced -> System section.
© 2009 - 2019 calendarspots.com