

Support -> How To Update a Staff Member's Schedule
How To Update a Staff Member's Schedule
This guide will show you how to update a staff member's regular work schedule within the appointment scheduling software.
Step 1. Enter the "Edit Schedules" Section
After selecting the "Staff" tab in the Settings page, select the "Edit Schedules" option.

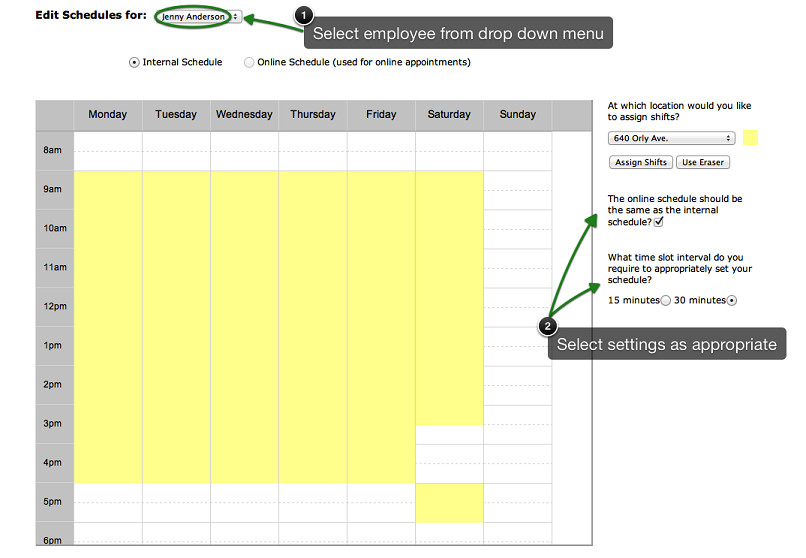
Step 2. Select the Employee
In the drop down menu next to "Edit Schedules for", select the staff member whose schedule
you would like to edit. That staff member's current weekly schedule will then appear below.
Note that if you have selected the option of having a different schedule for your
web portal, you can select whether you would like to edit the internal schedule or the online
web schedule by selecting on the corresponding button. You also have the option of
selecting intervals of 15 or 30 minutes.
We suggest using the same schedule for internal booking and online appointment scheduling. We only recommend enabling both schedules if you want to allow online scheduling for specific time slots within the day.
We suggest using the same schedule for internal booking and online appointment scheduling. We only recommend enabling both schedules if you want to allow online scheduling for specific time slots within the day.
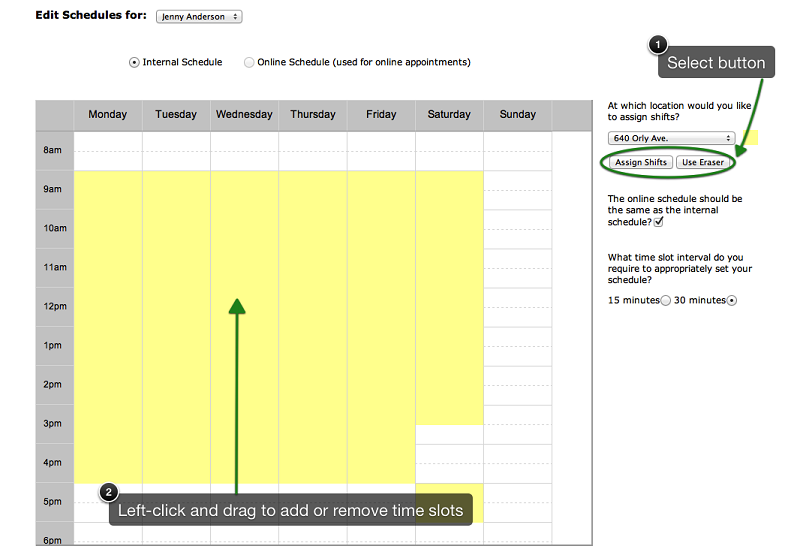
Step 3. Assign or Erase Time Slots within the Staff Member's Schedule
You may assign and erase time slots by clicking on the corresponding button to the right
of the schedule. To assign a shift, simply click on the "Assign Shifts" button, move your
pointer to the appropriate time slot on the schedule, left-click on your mouse and drag your
pointer over the time slots you want to include in your staff member's shift. Likewise, to
remove a time slot from your staff member's schedule, select the "Use Erase" button, move
your pointer to the appropriate time slot, left-click on your mouse and drag your pointer
accross the time slots you wish to remove.
Yellow indicates the staff member is available to be scheduled for appointments.
Yellow indicates the staff member is available to be scheduled for appointments.
Step 4. Save Your Changes
Don't forget to click the "Save" button at the bottom of the page to confirm your changes.
Step 5. Repeat if Your Online Schedule Differs From Your Internal Schedule
You may repeat steps 2 to 4 if you have opted to have different schedules for internal and
online bookings. Simply select the appropriate button at the top of the page to switch between
the online and internal schedules. Don't forget to save your changes before switching to another
schedule. The option may be selected by checking off the box to the right of the schedule.
© 2009 - 2019 calendarspots.com